Wednesday, March 12, 2014

My Go To Eye Makeup


My Go To Eye Makeup.

This is the look I wear almost every day. I might add a little more eyeliner occasionally but this is it! This look doesn't require lashes, unless you choose to wear them. :) hope you enjoy!

*Ignore my eyebrows in these pictures, I got them waxed and the lady who did them messed them up big time! I fill them in with pencil, then tweeze around the pencil to get the shape. They don't look like this anymore I promise haha.*


Alright to start off I take the MAC prolong wear concealer in the shade NW20, and pat that all over the eyelid from lash line to brow. I even put the concealer over my eyebrows to prime them for the pencil I use. I give that a minute to set then I start to go in with eye shadow. 


The first eye shadow I'm going to use is from MAC and it's called Soft Brown. This is my transition shade, so I'm going in with a fluffy brush and just sloppily throwing this in my crease from inner corner to outer corner. I focus the most product on the out edge of my crease. Once you have less product on your brush, you can start blending upward to your eyebrow. Like I said this is a transition shade, not a bold color. 

Next I take the color Brown Script, also from MAC on a 217 brush. I focus this color on the outer corner. You can take this into the inner corner if you'd like, but I chose not too. Just keep it deep and blown out in the outer v. Make sure you blend it into the soft brown without taking it up too high. I take a clean fluffy brush and run over everything just to make sure its blended. 

Then I take the color sketch from MAC, which is a beautiful deep purple. I keep this color very low, and only in the low parts of the outer corner. It's also Important to make sure you blend it out. I used my 217 once again, and kept it in small circular motions to get the shape I want. Keep it under the brown script. 

My lid color in this look is All That Glitters from MAC (shocker right?) I take this on a flat synthetic brush and place it on the inner two thirds of the eyelid. I also use my finger and put this right on the inner corner. 

The second to last eyes shadow step is to take a clean fluffy brush once again, and go in with the color Rule. It looks super intimidating but its perfect for my eye color and the other colors in this look. Keep this above the brown script over the soft brown. Blend blend blend until its even and seamless. 

The last eye shadow step I take is the brow highlight. I use my absolute favorite shadow for highlighting, the shade shroom from MAC. I take this on a flat synthetic brush, and place this right above rule and soft brown and underneath the brow. 


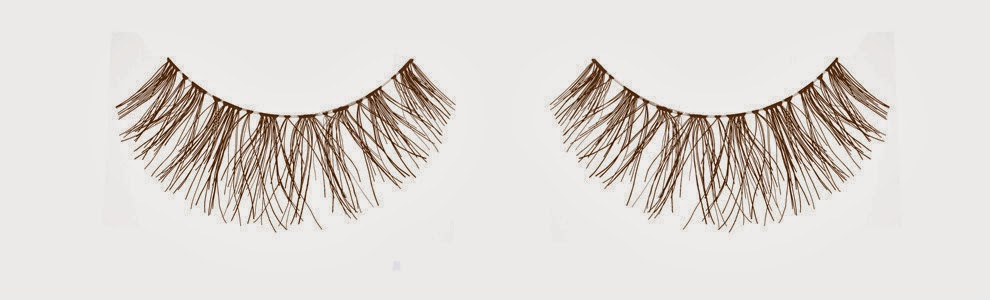
Okay so I'm lazy occasionally, and don't wear fake eyelashes everyday. But when I do I use the Ardell double up whispies. They are the bomb.com. Although they can be tricky to apply,  tweezers will become your best friend. After applying those I use the Maybelline Eyestudio gel eyeliner and an angle brush to make a very thin line just to cover up the lash band. 

I add some of the Better than Sex mascara from two faced, just at the base of the lashes, to blend the real ones and the fake ones together. Try not to get mascara on the fake ones, they wont look as natural, or last as long. 

PURCHASE THESE ITEMS HERE
MAC eye shadows
lashes
gel liner
mascara

thank you for reading!

Monday, March 10, 2014

Jan/Feb favorites!


         These are a few products I have been loving the past few months! They are not new products but they are new to me! hope you enjoy.


My first product is the Mac pro longwear concealer. I am totally obsessed with this stuff. It has a technology in it so its made to not settle into fine lines. For me it doubles as an eyeshadow base, instead of something like the primer potion or shadow insurance. I have really purple toned eyelids so this cancels out that color and gives me a clean slate to work with. Also, I use it under my eyes and in the inner corner of the eye along the nose. I'm in the shade NW20, which is a pink tone that is perfect for medium to light skin. I however would not use a pink tone to highlight the face. 


 This foundation is my CRACK. I use the Revlon colorstay whipped foundation pretty much everyday. This is my favorite drug store foundation that I've ever used. its a medium to full coverage foundation, with a natural finish. I really don't like matte finishes when it comes to foundation, and I'm not a big fan of the super dewy foundations either. This one is a mix of both, and it doesn't have any sunscreen in it so if you take pictures with flash you wont have that white look to your face.
                                                             

 This is the Milani baked blush in luminoso. I've hadn't tried any of the Milani products until the beginning of February but I am so glad I did. Luminoso is absolutely beautiful! its not too pink, or too peachy. Also its got some shine in it so in my opinion doesn't require a highlighter on the cheekbones. I purchased my this blush at CVS. I know for a fact you can buy them at walgreens too. Love love love love love, I totally recommend everyone to try this.                                                      
                                             

 Okay this blush is the 2nd Mac blush I've ever owned. I am absolutely addicted to it. its a super peachy blush with a matte finish. The name of the shade is "peaches." Its beautiful on the skin, and definelty something everyone should have in their makeup collection!
                                                 

Maybellline color tattoo pigments have become my new obsession! I have 2 of them, and I plan on adding to my stash! I have the shade buff and tuff and the shade downtown brown. Use a flat synthetic brush with some of the pigment and a bit of MAC fix plus and you'll have an awesome finish with a metallic shine! There are tons of different colors in these pigments, I'm going to pick up the black and purple shades tomorrow :)


Okay I'm normally not a big lipstick fan, unless its red lipstick. I was looking for something that would make my lips look just a bit more pigmented and make my teeth look whiter. This does the trick! the shade is called "Cream in your coffee" and it retails at $15.00. If your looking for a neutral shade with just a bit more pigmentation in your lips I recommend this to you! 

The very last thing on this list is the Milani lipglosses! They are CRAZY pigmented and come in beautiful shades! I don't even feel like I need to wear a lipstick underneath of these especially the red one. They are very affordable and I guarantee you will love them. I'm a bit of a packaging freak too, and the gold detail is so pretty! I took me about 6 months to get to the end of the red one. Pick them up! you will love them I promise.  
                                           

                           FOLLOW ME!
                                      Instagram: Margbrant
                                      Twitter: Margbrant